DIY: HOW TO CREATE A STAGHORN FERN LIVING WALL
Share

Want to add a burst of greenery to your home? Check out our guide to crafting a Staghorn Fern living wall.
Indoor plants spruce up the home by giving your space a fresh and lively appeal. They add a sunny vibe to the home especially since we’re now in the depths of winter…
So why not take the opportunity to get crafty with a leafy green wall display? If that feels too ambitious, fret not – we’ve teamed up with Zosia Berkieta-Lewis from The Plant Room who is an expert in all things lush, green and innovative.
WHAT YOU’LL NEED
- Tools needed to create staghorn fern living wall
- 4 square wood boards
- Hammer
- Nails
- Sphagnum moss
- Fishing wire
- Hessian fabric
- Picture hooks and wire
- Upholstery nails
- 4 staghorn ferns
- Pencil
STEP 1
Start off by sealing your wooden boards with wax. This is to protect the surface of the wood and to maintain an even finish.
STEP 2
Prep the wooden boards for hanging by attaching the wire to the back of the wood.
STEP 3
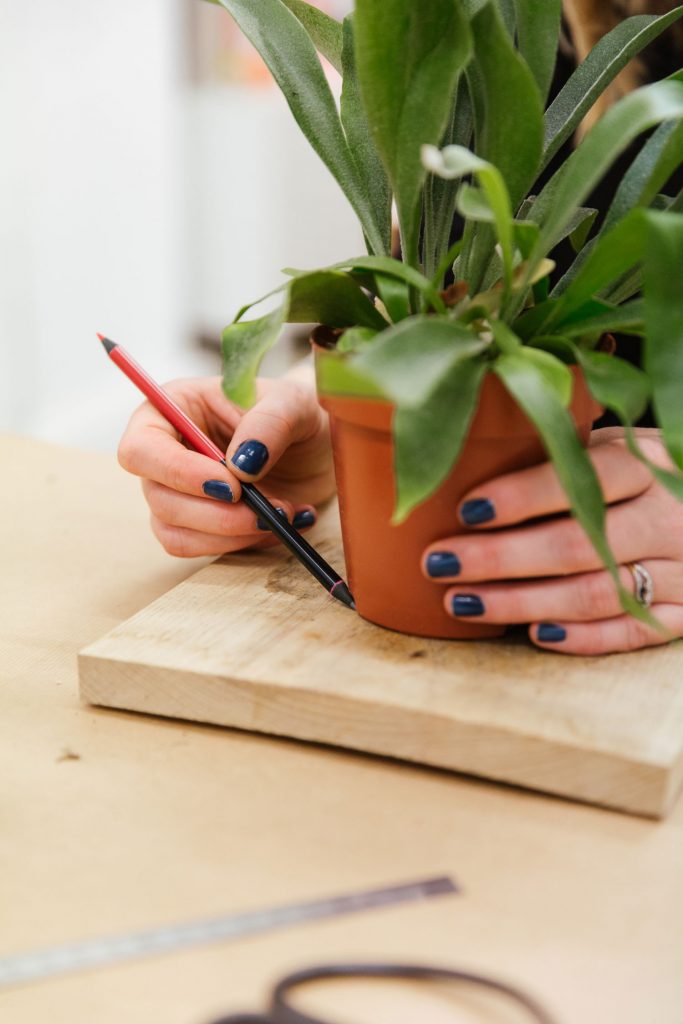
Next, trace the outline of the plant pot on the front part of the wooden boards with a pencil. The outline should be about 2.5cm wider than the circumference of your plant.
STEP 4
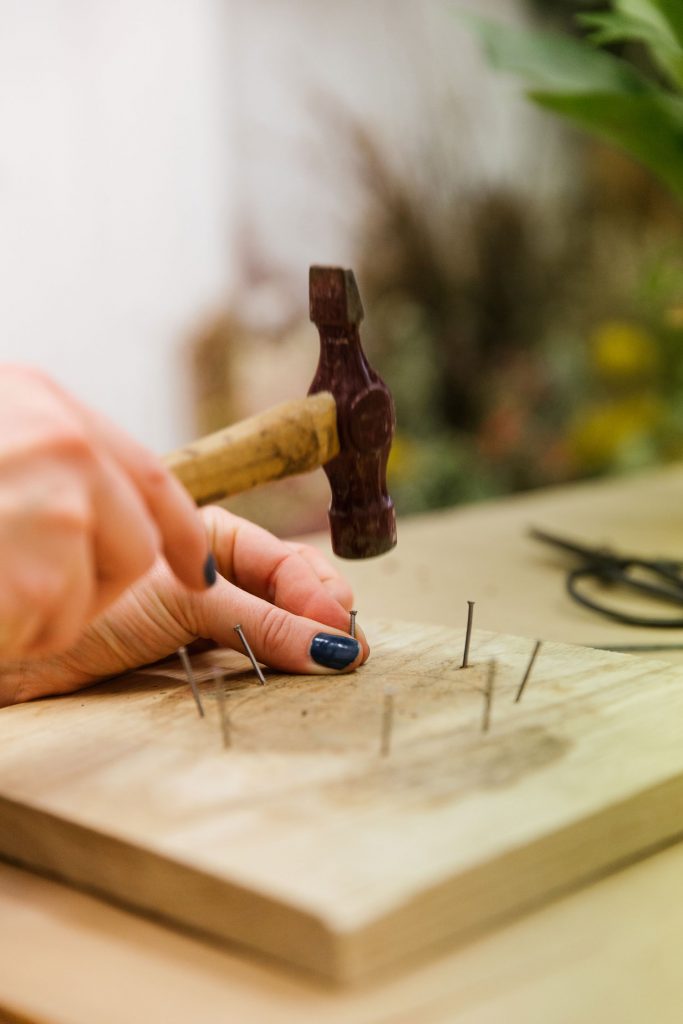
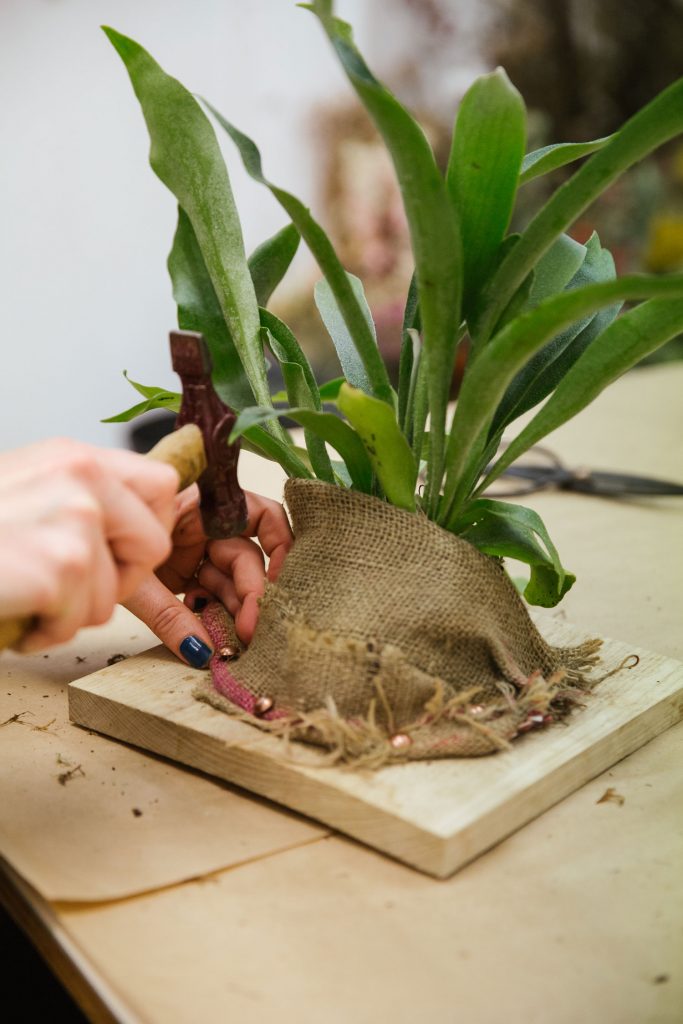
Hammering 8 nails along the outline of the wooden boards
To secure your plants, hammer in 8 nails along the pencilled outline of the wooden boards. Leave about 1cm space between each nail.
STEP 5
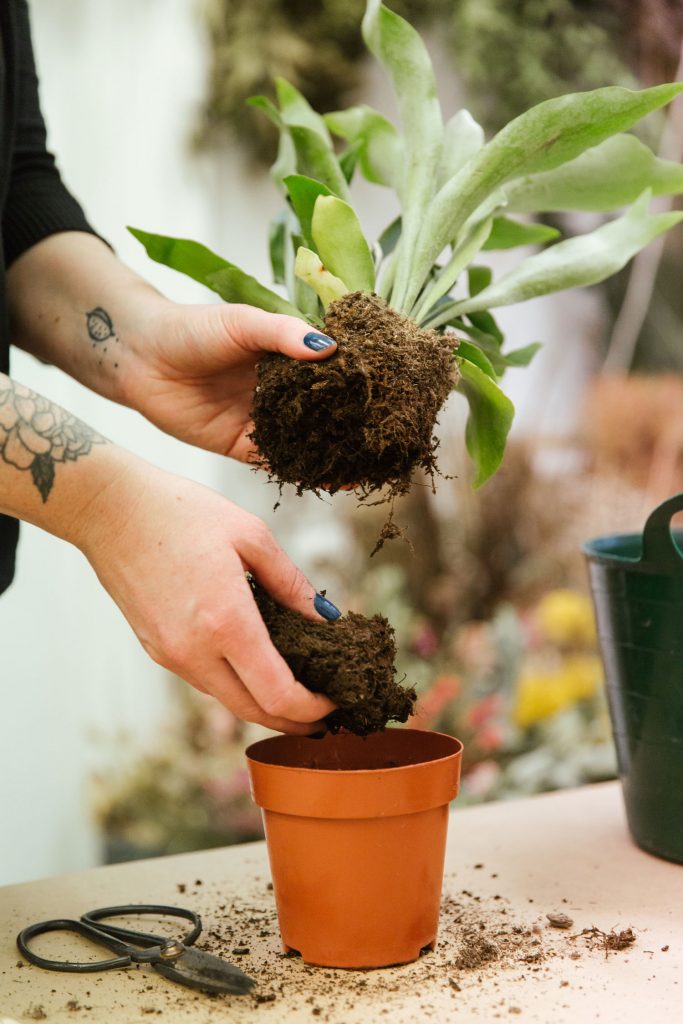
Start decanting the plant from its pot to prepare it for mounting.
STEP 6
Dunk the fern in water before you assemble it on the wooden board. We’ve got to keep it fresh!
STEP 7
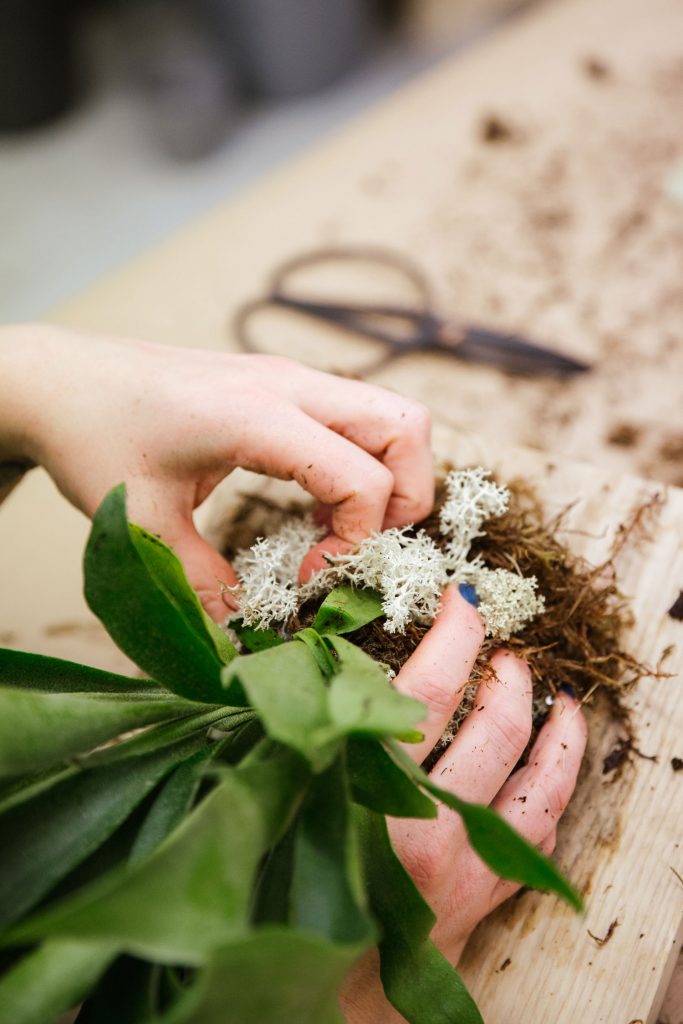
With potting soil already at the bottom, place the staghorn fern on the wooden board within the circle of nails. Then encase wet sphagnum moss around the base of the plant while making sure it stays in the circle.
STEP 8
Use fishing wire to protect the moss by attaching it to the wood board and wrapping it around the nails. If it’s possible, you can try wrapping it diagonally across the staghorn fern leaves.
STEP 9
Cut the hessian fabric to fit the size of the plant and wrap it around the soil. Fasten your fabric in place with the help of upholstery nails. Repeat the steps with the rest of the staghorn ferns and wooden boards. You’re almost done!
STEP 10
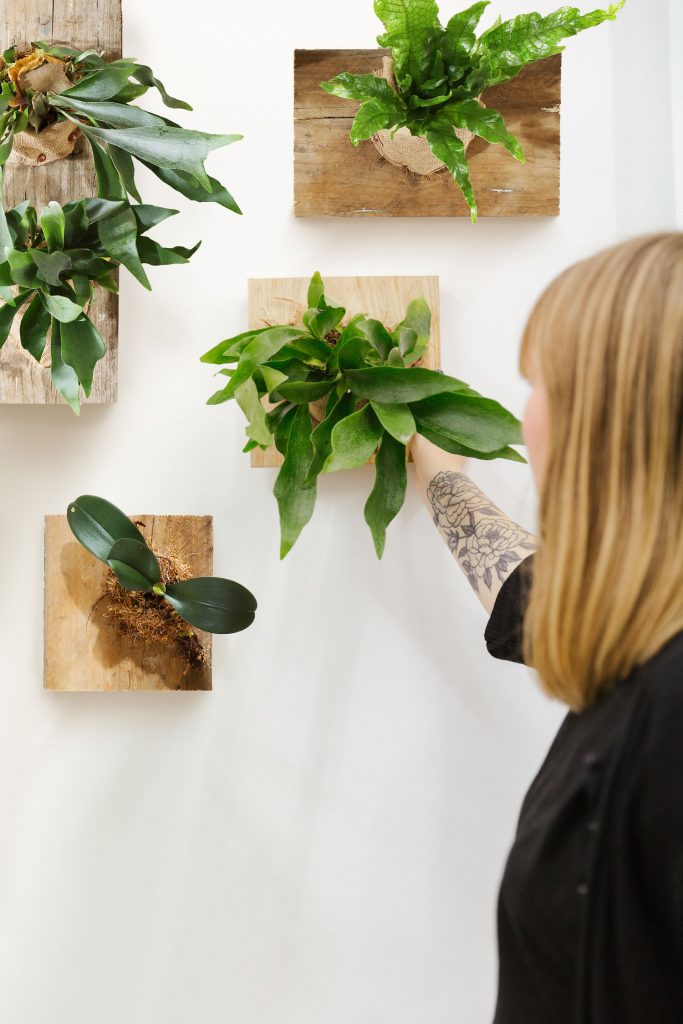
Finally, nail the boards into position on your wall. You will need about 2 nails to secure each wooden board to the wall. It’s up to you how you want to arrange the boards – what’s great about this display is that you can put your own spin to it.
BONUS TIPS
Care for your plants by spraying them weekly, and to make sure you’re giving them your tender, loving care, dunk it in water for 24 hours once a month.


Social Media